Maintenance Mode for Jira (Version 1.1.0)
Introduction
The Problem
Atlassian recommends to prevent users from accessing Jira e.g. while creating XML Backups. But even while administering JIRA or installing/configuring Apps, Jira Admins want to prevent users from accessing Jira.
In the past the Jira Admin had to ask the System Admin for support. And the System Admin had to reconfigure and restart Jira or to modify web server settings and to restart the web server.
The Solution
With "Maintenance Mode for Jira" Admins can easily switch JIRA into Maintenance Mode.
Only eligible Users can access the system while maintenance. For example, you want to test the system with a handful of users before handing it over to all users.
In the configuration screen you can easily define which Groups are allowed to access the system while maintenance.
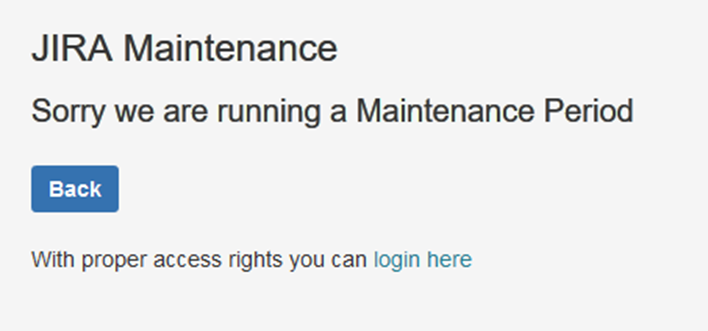
All users not belonging to the selected groups are served with a sorry page.
You can communicate with your Jira Users easily to announce a maintenance period or to force them to logout. There is a dedicated Maintenance banner what appears on any Jira Page. It is used as a preannouncement banner, when the maintenance has not started.

As soon as the Maintenance period has been activated eligible Users will see the Banner below.

In Addition all incoming and outgoing emails features will be disabled.
Any Other Users will see a Sorry Page
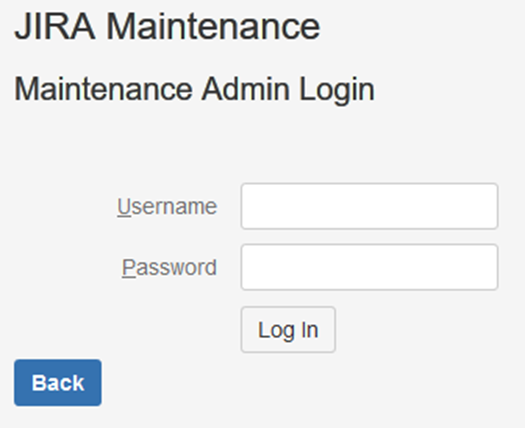
Via a dedicated Maintenance Login Screen, eligible users can login at any time
After you ended the Maintenance mode, this App must be disabled. The Admin Guide below shows alt the config options.
List of Blocked Urls:
The Addon will block access to the urls below:
- /login.jsp
- /secure/…
- /browse/….
- /rest/…
Administrators Guide
You will find the config settings link in the left panel menu of the AddOns Administration.
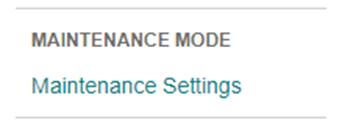
The Settings and Operations Menu
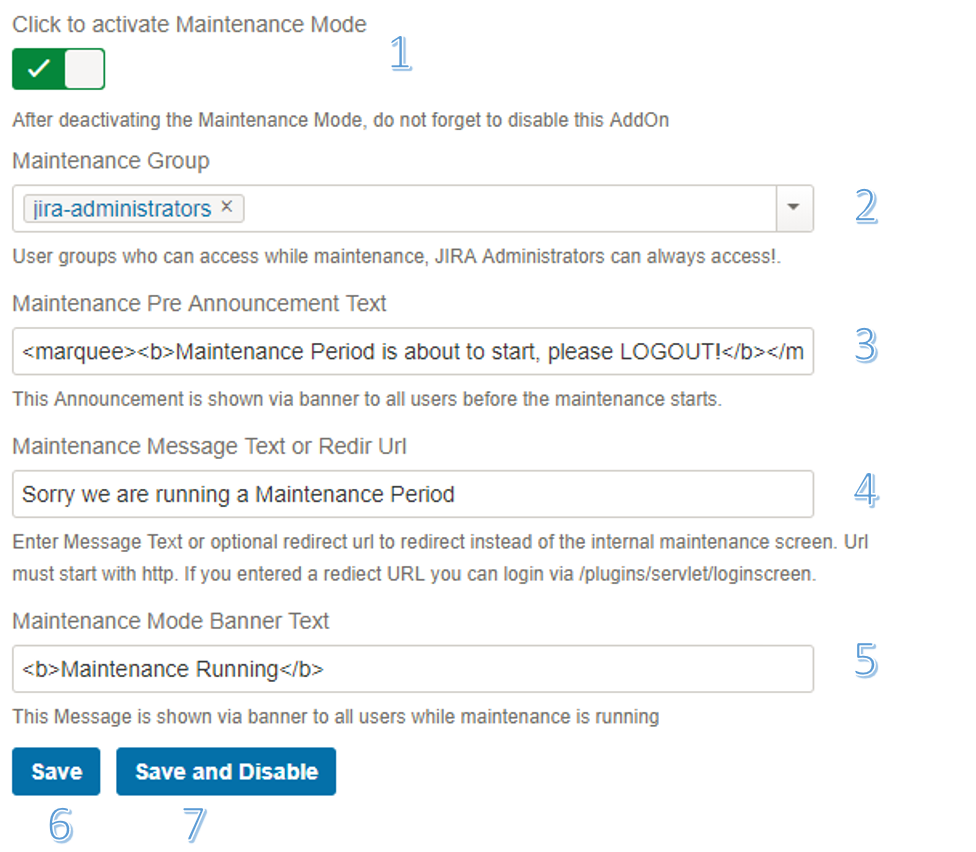
1) Activate Switch
Enable this switch to start the Maintenance Mode
2) Maintenance Group(s)
Select the groups of users who may access the system while maintenance. “jira-administrators” group member will always be able to access, so you can not lock you out yourself.
3) Maintenance Pre Announcement Text
Enter the text to display as a preannouncement to the users
4) Maintenance Message or Redir Url
Enter a text to display on the sorry page. You can enter any HTML here. Or you can enter a url instead to redirect to. In case you redirected to a url the admin login will be available via /plugins/servlet/loginscreen.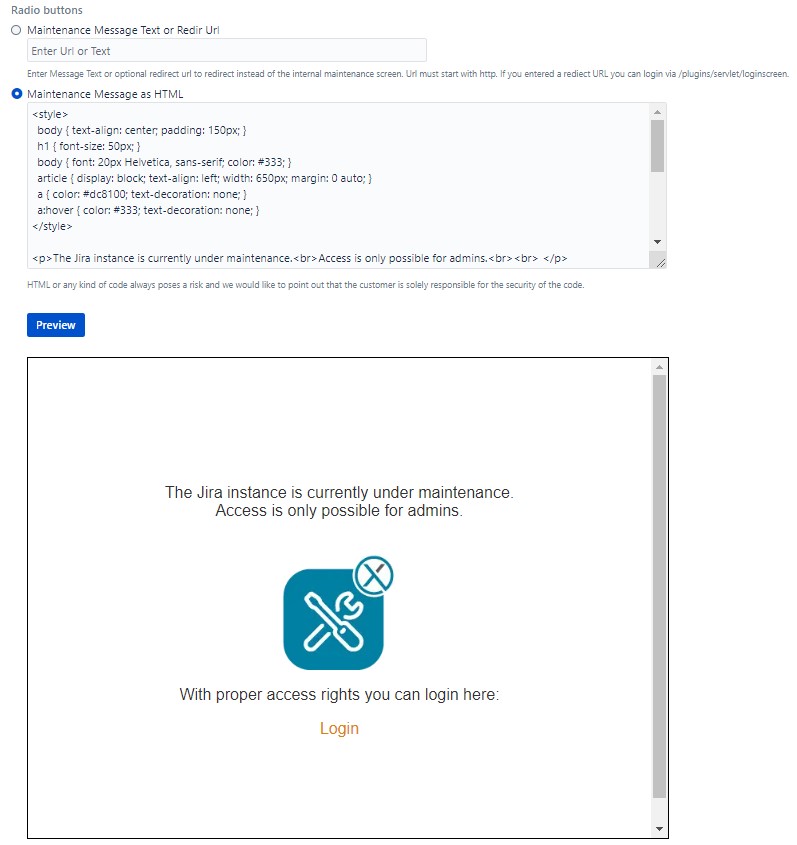
5) Maintenance Mode Banner Text
Enter the text what is displayed to eligible Users.
6) Save - Button
Click “Save” to save your settings
7) Save and Disable - Button
Click this Button to Save Settings and disable the AddOn when maintenance period is done.
Prepare add-on
Installation
Automated: Add-ons in Marketplace
- OpenAdministration drop down menu
- Click onAdd-ons
- Find new add-ons
- Search for "Maintenance Mode for Jira"
Manual: https://confluence.atlassian.com/display/UPM/Installing+add-ons
Upgrade
You've got a valid license? Hooray!
- OpenAdministration drop down menu
- Click onAdd-ons
- Manage add-ons
- Search for Maintenance Mode for Jira
If Update is displayed press it 
License
Maintenance Mode for Jira licenses can be purchased through the Atlassian Marketplace.
After you bought your license follow following steps to apply:
- OpenAdministration drop down menu
- Click onAdd-ons
- Manage add-ons
- Search forMaintenance Mode for Jira
- Click on add-on entry
- Copy-and-paste the license key into the license box and press update
- Optional: Get cake!
For further information see here: https://confluence.atlassian.com/display/jirakb/How+to+Update+Your+Add-on+License
FAQ & Troubleshooting
After adding a license the AddOn is still not working properly
Solution:
- Disable and Reenable the AddOn
- Make sure you have selected a group in the config settings
After installing the AddOn I still cannot see the config link
Solution:
This is a known Jira issue, please press reload to reload the UPM Page in your Browser.
I have another question!
Just send an email to our Service Desk!